Appearance
Complex layouts and grids
By combining various elements, you can build complex layouts. When designing try to break your layout into separate pieces and then model them by using the Row and the Column elements. In many cases, the Grid element can simplify and shorten your code.
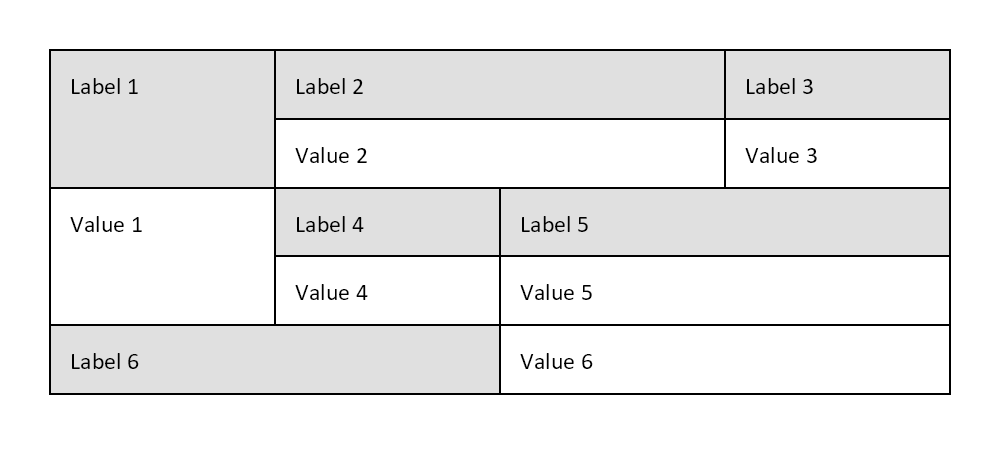
Please consider the code below. Please note that it uses example DSL elements from the previous section.
c#
.Column(column =>
{
    column.Item().Row(row =>
    {
        row.RelativeItem().LabelCell("Label 1");

        row.RelativeItem(3).Grid(grid =>
        {
            grid.Columns(3);

            grid.Item(2).LabelCell("Label 2");
            grid.Item().LabelCell("Label 3");

            grid.Item(2).ValueCell().Text("Value 2");
            grid.Item().ValueCell().Text("Value 3");
        });
    });

    column.Item().Row(row =>
    {
        row.RelativeItem().ValueCell().Text("Value 1");

        row.RelativeItem(3).Grid(grid =>
        {
            grid.Columns(3);

            grid.Item().LabelCell("Label 4");
            grid.Item(2).LabelCell("Label 5");

            grid.Item().ValueCell().Text("Value 4");
            grid.Item(2).ValueCell().Text("Value 5");
        });
    });

    column.Item().Row(row =>
    {
        row.RelativeItem().LabelCell("Label 6");
        row.RelativeItem().ValueCell().Text("Value 6");
    });
});
And its corresponding output:

TIP
When implementing complex grids and layouts, please also consider using the Table element. Click here to learn more